Creating iOS Widgets with SwiftUI

Mansour Mahamat
10/15/2024

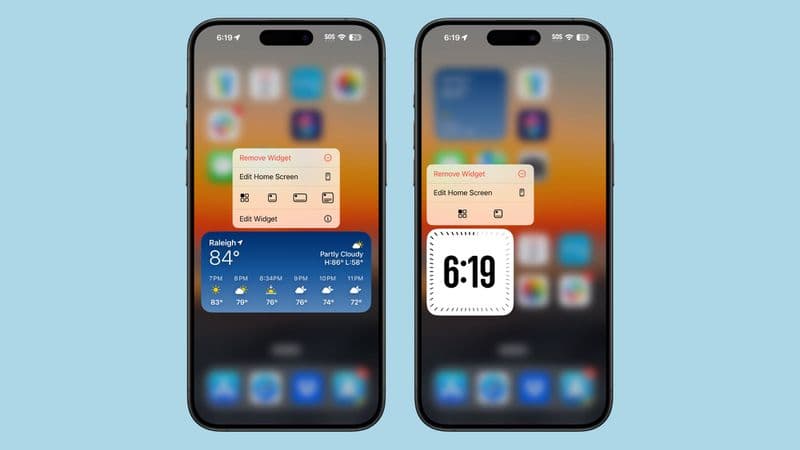
iOS widgets have become an integral part of the iPhone user experience, allowing users to access key information from their favorite apps right from the home screen. In this guide, we'll walk through the process of creating your own iOS widget using SwiftUI.
What are iOS Widgets?
Widgets are miniature versions of your app that display glanceable content on the iOS home screen. They come in three sizes: small, medium, and large, and can be customized to show different information based on the user's preferences.
Step 1: Set Up Your Project
First, let's set up a new Xcode project with widget capabilities:
- Open Xcode and create a new iOS app project.
- Go to File > New > Target.
- Choose "Widget Extension" and click Next.
- Name your widget (e.g., "MyAppWidget") and click Finish.
Xcode will create a new target for your widget and add the necessary files.
Step 2: Define Your Widget Structure
In the newly created widget file (likely named MyAppWidget.swift), you'll see a structure like this:
struct MyAppWidget: Widget {
    let kind: String = "MyAppWidget"

    var body: some WidgetConfiguration {
        StaticConfiguration(kind: kind, provider: Provider()) { entry in
            MyAppWidgetEntryView(entry: entry)
        }
        .configurationDisplayName("My Widget")
        .description("This is an example widget.")
    }
}
This structure defines your widget's configuration. The StaticConfiguration is used for widgets that update on a schedule or when the system decides to refresh them.
Step 3: Create a Timeline Provider
The Timeline Provider is responsible for generating the content that will be displayed in your widget. Let's create a simple provider:
struct Provider: TimelineProvider {
    func placeholder(in context: Context) -> SimpleEntry {
        SimpleEntry(date: Date())
    }

    func getSnapshot(in context: Context, completion: @escaping (SimpleEntry) -> ()) {
        let entry = SimpleEntry(date: Date())
        completion(entry)
    }

    func getTimeline(in context: Context, completion: @escaping (Timeline<Entry>) -> ()) {
        var entries: [SimpleEntry] = []

        // Generate a timeline consisting of five entries an hour apart, starting from the current date.
        let currentDate = Date()
        for hourOffset in 0 ..< 5 {
            let entryDate = Calendar.current.date(byAdding: .hour, value: hourOffset, to: currentDate)!
            let entry = SimpleEntry(date: entryDate)
            entries.append(entry)
        }

        let timeline = Timeline(entries: entries, policy: .atEnd)
        completion(timeline)
    }
}

struct SimpleEntry: TimelineEntry {
    let date: Date
}
This provider creates a timeline with entries for the next 5 hours, updating the widget every hour.
Step 4: Design Your Widget UI
Now, let's create the UI for our widget using SwiftUI:
struct MyAppWidgetEntryView : View {
    var entry: Provider.Entry

    var body: some View {
        VStack {
            Text("Hello, Widget!")
                .font(.headline)
            Text(entry.date, style: .time)
                .font(.subheadline)
        }
    }
}
This creates a simple widget that displays "Hello, Widget!" and the current time.
Step 5: Preview Your Widget
To see how your widget looks in different sizes, add this preview provider:
struct MyAppWidget_Previews: PreviewProvider {
    static var previews: some View {
        MyAppWidgetEntryView(entry: SimpleEntry(date: Date()))
            .previewContext(WidgetPreviewContext(family: .systemSmall))

        MyAppWidgetEntryView(entry: SimpleEntry(date: Date()))
            .previewContext(WidgetPreviewContext(family: .systemMedium))

        MyAppWidgetEntryView(entry: SimpleEntry(date: Date()))
            .previewContext(WidgetPreviewContext(family: .systemLarge))
    }
}
This will show you how your widget looks in small, medium, and large sizes.
Step 6: Customize Your Widget
Let's make our widget more interesting by adding some dynamic content:
struct MyAppWidgetEntryView : View {
    var entry: Provider.Entry
    @Environment(\.widgetFamily) var family

    var body: some View {
        switch family {
        case .systemSmall:
            SmallWidgetView(entry: entry)
        case .systemMedium:
            MediumWidgetView(entry: entry)
        case .systemLarge:
            LargeWidgetView(entry: entry)
        @unknown default:
            Text("Unsupported widget size")
        }
    }
}

struct SmallWidgetView: View {
    var entry: Provider.Entry

    var body: some View {
        VStack {
            Text("Small Widget")
            Text(entry.date, style: .time)
        }
    }
}

struct MediumWidgetView: View {
    var entry: Provider.Entry

    var body: some View {
        HStack {
            Text("Medium Widget")
            Spacer()
            Text(entry.date, style: .time)
        }
    }
}

struct LargeWidgetView: View {
    var entry: Provider.Entry

    var body: some View {
        VStack {
            Text("Large Widget")
            Spacer()
            Text(entry.date, style: .time)
            Spacer()
            Text("More content here")
        }
    }
}
This code creates different layouts for each widget size.
Step 7: Add Functionality
To make your widget truly useful, you'll want to add real data. Here's an example of how you might modify the SimpleEntry and Provider to include weather data:
struct SimpleEntry: TimelineEntry {
    let date: Date
    let temperature: Int
    let condition: String
}

struct Provider: TimelineProvider {
    func placeholder(in context: Context) -> SimpleEntry {
        SimpleEntry(date: Date(), temperature: 72, condition: "Sunny")
    }

    func getSnapshot(in context: Context, completion: @escaping (SimpleEntry) -> ()) {
        let entry = SimpleEntry(date: Date(), temperature: 72, condition: "Sunny")
        completion(entry)
    }

    func getTimeline(in context: Context, completion: @escaping (Timeline<Entry>) -> ()) {
        var entries: [SimpleEntry] = []

        // Generate a timeline consisting of five entries an hour apart, starting from the current date.
        let currentDate = Date()
        for hourOffset in 0 ..< 5 {
            let entryDate = Calendar.current.date(byAdding: .hour, value: hourOffset, to: currentDate)!
            let entry = SimpleEntry(date: entryDate, temperature: Int.random(in: 60...90), condition: ["Sunny", "Cloudy", "Rainy"].randomElement()!)
            entries.append(entry)
        }

        let timeline = Timeline(entries: entries, policy: .atEnd)
        completion(timeline)
    }
}
Then update your widget views to display this information:
struct SmallWidgetView: View {
    var entry: Provider.Entry

    var body: some View {
        VStack {
            Text("\(entry.temperature)°F")
                .font(.largeTitle)
            Text(entry.condition)
                .font(.caption)
        }
    }
}
Conclusion
You've now created a basic iOS widget using SwiftUI! Here's a recap of what we've covered:
- Setting up a widget extension in your Xcode project
- Defining the widget structure
- Creating a timeline provider to supply widget content
- Designing the widget UI with SwiftUI
- Previewing the widget in different sizes
- Customizing the widget for different size classes
- Adding dynamic functionality to make the widget useful
Remember, widgets should provide quick, glanceable information that's relevant to your users. As you continue to develop your widget, consider these best practices:
- Keep it simple and focused
- Update content regularly to keep it fresh
- Use deep links to allow users to open your app directly from the widget
- Test your widget thoroughly on different devices and in different contexts
With these tools and techniques, you're well-equipped to create engaging and useful widgets that will keep your users coming back to your app. Happy coding!